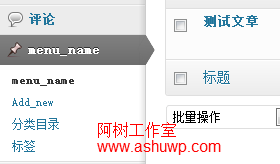
前面刚建了给WordPress创建新的文章类型函数:register_post_type()该函数还有个taxonomies参数,用来给自定义文章类型添加分类法制止,给wordpress添加默认的分类和标签支持方法很简单,只需要在创建文章类型的时候设置taxonomies参数如下:
'taxonomies'=> array('category','post_tag'),


<?php
register_taxonomy($taxonomy, $object_type, $args);
//$taxonomy 字符串型,必需,分类法的名称,用英文哦
//$object_type 数组或字符串,必需,分类法所对应的文章类型
//$args--可选,配置参数
?>


<?php
add_action('init', 'my_custom_init');
function my_custom_init()
{
  $labels = array(
    'name' => '书本name',
    'singular_name' => '书本singularname',
    'add_new' => 'Add_new',
    'add_new_item' => 'add_new_item',
    'edit_item' => 'edit_item',
    'new_item' => 'new_item',
    'view_item' => 'view_item',
    'search_items' => 'search_items',
    'not_found' =>  'not_found',
    'not_found_in_trash' => 'not_found_in_trash',
    'parent_item_colon' => '',
    'menu_name' => 'menu_name'

  );
  $args = array(
    'labels' => $labels,
    'description'=> '嘿,这是一个自定义的文章类型',
    'public' => true,
    'publicly_queryable' => true,
    'show_ui' => true,
    'show_in_menu' => true,
    'query_var' => true,
    'rewrite' => true,
    'capability_type' => 'post',
    'has_archive' => true,
    'hierarchical' => false,
    'menu_position' => null,
    'taxonomies'=> array('category','post_tag'),
    'supports' => array('title','editor','author','thumbnail','excerpt','comments')
  );
  register_post_type('book',$args);

  $labels = array(
        'name' => '国籍',
        'singular_name' => 'country',
        'search_items' =>  '搜索' ,
        'popular_items' => '热门' ,
        'all_items' => '所有' ,
        'parent_item' => null,
        'parent_item_colon' => null,
        'edit_item' => '编辑' ,
        'update_item' => '更新' ,
        'add_new_item' => '添加' ,
        'new_item_name' => '国籍名称',
        'separate_items_with_commas' => '按逗号分开' ,
        'add_or_remove_items' => '添加或删除',
        'choose_from_most_used' => '从经常使用的类型中选择',
        'menu_name' => '国籍分类',
    );

    register_taxonomy(
        'country',
        array('book'),
        array(
            'hierarchical' => true,
            'labels' => $labels,
            'show_ui' => true,
            'query_var' => true,
            'rewrite' => array( 'slug' => 'country' ),
        )
    );
}
?>
效果如图:

然后这在实际中的用法很少,一般情况下我们使用新的分类法,比如我们要做一个企业站,给产品做了一个新的文章类型product。我们要给产品归类,可以按类别分,比如电脑、手机。还可以按产地分,比如:国产山寨、水货,还可以按价格区间分,比如:1000元以下、1000到3000,等等,我们就需要同时有3个分类法:类别、产地、价格区间。
在本部分教程的第一篇中我们也提到了,在wp-includes/post.PHP文件中wordpress使用register_taxonomy函数创建了分类-category和标签-post_tag两个分类法。
下面是register_taxonomy函数的参数好用法:
'taxonomies'=> array('category','post_tag'),


<?php
register_taxonomy($taxonomy, $object_type, $args);
//$taxonomy 字符串型,必需,分类法的名称,用英文哦
//$object_type 数组或字符串,必需,分类法所对应的文章类型
//$args--可选,配置参数
?>


<?php
add_action('init', 'my_custom_init');
function my_custom_init()
{
  $labels = array(
    'name' => '书本name',
    'singular_name' => '书本singularname',
    'add_new' => 'Add_new',
    'add_new_item' => 'add_new_item',
    'edit_item' => 'edit_item',
    'new_item' => 'new_item',
    'view_item' => 'view_item',
    'search_items' => 'search_items',
    'not_found' =>  'not_found',
    'not_found_in_trash' => 'not_found_in_trash',
    'parent_item_colon' => '',
    'menu_name' => 'menu_name'

  );
  $args = array(
    'labels' => $labels,
    'description'=> '嘿,这是一个自定义的文章类型',
    'public' => true,
    'publicly_queryable' => true,
    'show_ui' => true,
    'show_in_menu' => true,
    'query_var' => true,
    'rewrite' => true,
    'capability_type' => 'post',
    'has_archive' => true,
    'hierarchical' => false,
    'menu_position' => null,
    'taxonomies'=> array('category','post_tag'),
    'supports' => array('title','editor','author','thumbnail','excerpt','comments')
  );
  register_post_type('book',$args);

  $labels = array(
        'name' => '国籍',
        'singular_name' => 'country',
        'search_items' =>  '搜索' ,
        'popular_items' => '热门' ,
        'all_items' => '所有' ,
        'parent_item' => null,
        'parent_item_colon' => null,
        'edit_item' => '编辑' ,
        'update_item' => '更新' ,
        'add_new_item' => '添加' ,
        'new_item_name' => '国籍名称',
        'separate_items_with_commas' => '按逗号分开' ,
        'add_or_remove_items' => '添加或删除',
        'choose_from_most_used' => '从经常使用的类型中选择',
        'menu_name' => '国籍分类',
    );

    register_taxonomy(
        'country',
        array('book'),
        array(
            'hierarchical' => true,
            'labels' => $labels,
            'show_ui' => true,
            'query_var' => true,
            'rewrite' => array( 'slug' => 'country' ),
        )
    );
}
?>
$args参数是个数组,跟register_post_type函数的$args参数类似,详细:
label-
labels-数组:
- 'name'
- 'singular_name'
- 'search_items'
- 'popular_items'
- 'all_items'
- 'parent_item'
- ....略
public-
show_in_nav_menus-是否在菜单设置页面显示
....略,参考register_post_type函数
实例,在前面的一篇文章中,我们新建了一个book文章类型,下面我们为这个book文章类型添加一个国家-country分类法支持,完整代码如下(保留了上面添加的分类和标签支持):
'taxonomies'=> array('category','post_tag'),


<?php
register_taxonomy($taxonomy, $object_type, $args);
//$taxonomy 字符串型,必需,分类法的名称,用英文哦
//$object_type 数组或字符串,必需,分类法所对应的文章类型
//$args--可选,配置参数
?>


<?php
add_action('init', 'my_custom_init');
function my_custom_init()
{
  $labels = array(
    'name' => '书本name',
    'singular_name' => '书本singularname',
    'add_new' => 'Add_new',
    'add_new_item' => 'add_new_item',
    'edit_item' => 'edit_item',
    'new_item' => 'new_item',
    'view_item' => 'view_item',
    'search_items' => 'search_items',
    'not_found' =>  'not_found',
    'not_found_in_trash' => 'not_found_in_trash',
    'parent_item_colon' => '',
    'menu_name' => 'menu_name'

  );
  $args = array(
    'labels' => $labels,
    'description'=> '嘿,这是一个自定义的文章类型',
    'public' => true,
    'publicly_queryable' => true,
    'show_ui' => true,
    'show_in_menu' => true,
    'query_var' => true,
    'rewrite' => true,
    'capability_type' => 'post',
    'has_archive' => true,
    'hierarchical' => false,
    'menu_position' => null,
    'taxonomies'=> array('category','post_tag'),
    'supports' => array('title','editor','author','thumbnail','excerpt','comments')
  );
  register_post_type('book',$args);

  $labels = array(
        'name' => '国籍',
        'singular_name' => 'country',
        'search_items' =>  '搜索' ,
        'popular_items' => '热门' ,
        'all_items' => '所有' ,
        'parent_item' => null,
        'parent_item_colon' => null,
        'edit_item' => '编辑' ,
        'update_item' => '更新' ,
        'add_new_item' => '添加' ,
        'new_item_name' => '国籍名称',
        'separate_items_with_commas' => '按逗号分开' ,
        'add_or_remove_items' => '添加或删除',
        'choose_from_most_used' => '从经常使用的类型中选择',
        'menu_name' => '国籍分类',
    );

    register_taxonomy(
        'country',
        array('book'),
        array(
            'hierarchical' => true,
            'labels' => $labels,
            'show_ui' => true,
            'query_var' => true,
            'rewrite' => array( 'slug' => 'country' ),
        )
    );
}
?>

更新--前台使用方法:
文章类型归档模板:如果你需要一个现实所有该文章类型的模板,请在后台新建一个archive-{post_type}.php,比如上面的book类型,新建archive-book.php,用这个模板文件默认可显示所有book类型的文章。
分类模板:taxonomy-{taxonomy_slug}.php-这是自定义分类法的分类页,比如上面代码中我们新建了一个分类法country,使用taxonomy-country.php文件,就是这个分类法的分类页面了。
代码获取分类:对于默认的分类,我们可以使用get_categories()函数来获取分类,对于自定义分类法,这个函数同样适用,只是注意taxonomy 参数。
通过ID获取分类连接:默认分类我们通过分类ID获取分类链接是使用函数:get_category_link()。但是自定义分类法我们应该使用get_term_link()函数,函数用法这里就不说了,请看官自己到官网查看。